Saturday, 18 October 2014

Sour Dough Update

Sour Dough in the garden.
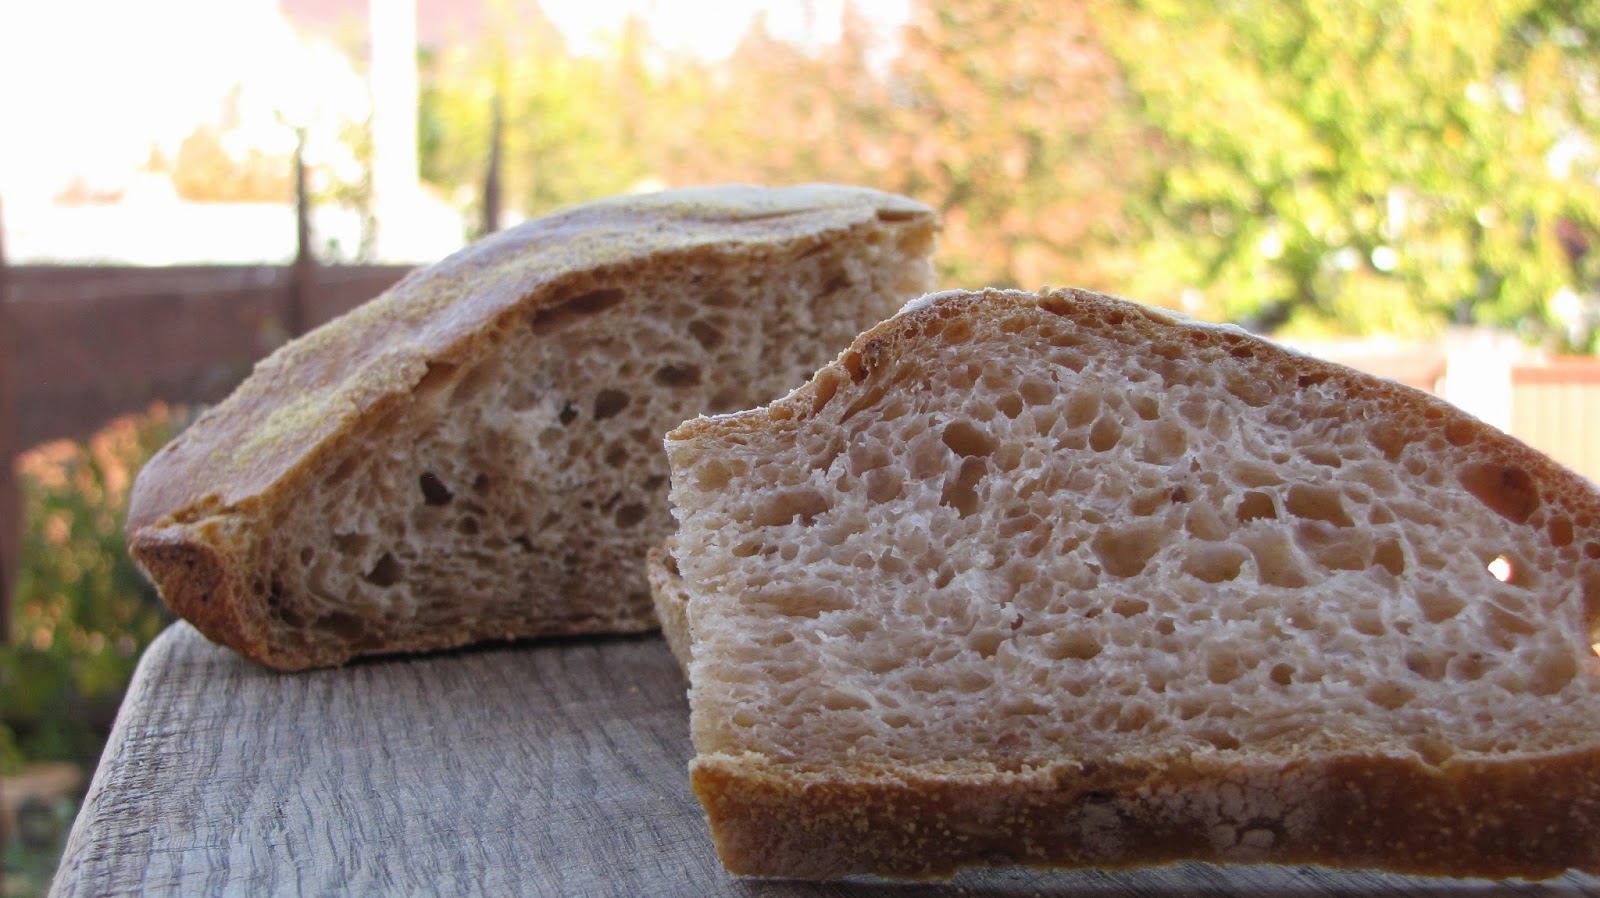
Well, it’s been almost three months since I created my starter and I’m pleased to say that it is still alive and well and producing decent loaves of beautiful sour dough bread, flavoursome with a gorgeous texture.


3 months old this week!
I am able to leave it in the fridge for weeks at a time and reactivate it with a good feed to get it going again.  When left alone for a while it does develop quite a strong ‘alcohol’ smell which is a by – product of the feeding but that disappears when you work up the sponge.


It also separates when left alone as you can see here but returns to normal when mixed. 


I'm keeping it in a 2 litre Kilner style jar with a clip lid which gives me enough room to give it a good feed when needed.

I must say a huge thank you to Ballymaloe Cookery School as they have been most interested in my progress and still giving me advice by email.  Now that goes to show Ballymaloe is a school that actually really cares about their students’ progress even after the course has finished.


A few things of note...

Firstly, follow the procedure carefully!  On one occasion I didn’t do the float test and ended up with a very flat loaf indeed as the starter wasn’t at the active stage.  The activity of the yeast is of paramount importance to get a well risen loaf.

Secondly, it’s tough doing it by hand.  Whilst I got good and tasty results, it is extremely hard going kneading by hand due to the high level of hydration in the dough.  I have bought a Kenwood mixer for the first time to make life easier and I must admit I love it.  Although I still believe that we should all learn how to make bread by hand first so you know the stages from flour to loaf intimately.

Thirdly, it really does need that level of hydration.  As I was experimenting  I tried reducing the amount of water to make it easier to knead.  It was not as good by a long chalk.  Get the water in there no matter how sloppy it is.

And finally, sour dough toast with seasoned fried field mushrooms is a thing of beauty.  Tasty enough for you to give up the search for a meaningful relationship. 


If you want the full details on Sour Dough then check out my post...

http://theredbookcook.blogspot.com/2014/07/sough-dough-rules.html


Bon Appetit

Tuesday, 14 October 2014

Orange and Almond Cake


Sweet and sticky with a beautiful nutty flavour laced with orange and cinnamon.  This is a really impressive cake which simply develops the basic sponge recipe and elevates it to a massive crowd pleaser.  Orange and almond is a great combination and has a real taste of the Mediterranean.

Making an orange and cinnamon syrup to be poured over the cake when cooked brings a glorious stickiness and also gets more flavour into the sponge.

Make sure you buy whole almonds with the skin on as the flavour is so much better than the pre – skinned ones.  Almonds can be replaced with hazelnuts if you prefer.

I’ve chosen a simple segmented orange and mint accompaniment to balance the sweetness but you could easily use crème fresh instead.


Read my post on how to bake a sponge for the basics…


The technique is the same but with a few added twists…

Ingredients

For the cake…
  • 2 eggs weighed in their shells
  • Equal quantities of caster sugar, butter and self raising flour.
  • The zest of one large orange
  • 75g whole almonds with the skin on.
  • A little whole milk
For the syrup…
  • A small stick of cinnamon
  • 75g caster sugar
  • 75 ml water
  • The juice of one large orange
To serve…
  • Two large oranges
  • A sprinkling of caster sugar
  • Chopped mint

Utensils

  • A big mixing bowl
  • An 18cm cake tin
  • A wooden spoon
  • A metal spoon
  • A skewer
  • A sharp filleting knife.

Method

Pre – heat your oven to 180 °C / Fan 160 °C

Have your cake tin greased and ready to go.

Blanche your almonds by pouring boiling water onto the almonds in saucepan.  Leave for a couple of minutes.  Drain.  You should be able to squeeze the almond and it pops out of the skin cleanly.  If not, repeat the process until it does.


Place the almonds on a baking tray and put in your pre - heated oven to brown.  About 10 minutes should suffice but keep your eye on them as they must not burn!

Reserve 8 of the nicest looking almonds for decoration and then bash the rest into coarse pieces in a pestle and mortar or under a tea towel with a rolling pin works well.


Using the wooden spoon cream the butter, orange zest and sugar together in the mixing bowl until pale and fluffy and lots of air has been incorporated.  10 minutes should do it depending on the strength of your arm!

Whisk your eggs in a separate bowl and gradually start to add a little at a time to your butter / sugar mix.  Beat well between each addition and incorporate all the egg before adding more.  If it looks like it has split then you can add a teaspoon of flour to stabilize it.

Once all the egg had been added then sieve your flour into the bowl.  Sieving gets rid of lumps and incorporates more air.

Fold in the flour using the large metal spoon.  Check for dropping consistency.  Add milk a little at a time if the mixture is too thick.

Then fold in the bashed up almonds.

Spoon the mixture into your pre – greased cake tin.  Try to smooth it level and have the edges higher than the centre as it will rise more in the middle.

Put it straight into the oven and bake for 25 - 30 minutes depending on your oven. 


Meanwhile, make your syrup…

In a small saucepan place the sugar, water, orange juice and cinnamon stick.  Bring to a gentle simmer and let it seethe until it has reached a sticky syrupy state yet is still most definitely mobile.  It needs to be a pouring consistency.  Remember also that it will thicken as it cools, you can always return to the heat to reduce more if needed.


Now the Orange and Mint…

Simply segment the orange (there are lots of instructional videos on YouTube) and then mix with chopped fresh mint and a sprinkling of caster sugar depending on the sweetness of your orange!


Remove the cake from the oven and insert a skewer.  If it comes out clean with no mixture sticking to it then it is ready. If there is any mixture on the skewer return to the oven for another few minutes. 

Allow to cool a little and then release from the tin and put on a cooling rack.  While still warm, pierce the top all over with the skewer to create small holes for the syrup to penetrate.


Pour the syrup all over making sure it gets into all the holes and is smoothed over the whole top of the cake.

Decorate with the reserved almonds and pieces of orange.  The rest of the orange can be served by the side of each slice.


Lovely at any time.


Sunday, 12 October 2014

A Highland Wedding Tradition - Shortbread.

My friend and housemate from Ballymaloe Cookery School, Katie, is getting married this Saturday.  I am absolutely bummed that I can't be there, so I wanted to research and dedicate a post to Katie and her groom, Nick, wishing them joy and happiness from their wedding day onwards.


Slushy stuff over, let's talk Scottish wedding traditions!  Of all the Scottish traditions I found that I could post on a family friendly blog such as this I discovered Shortbread.

Apparently, it was tradition that the bride would have shortbread broken over her head upon arrival back at the new marital home.  I can't find any suggestion of why, so if anybody knows then please tell.

Why is it called 'shortbread'?  Well, firstly it is short, as in crumbly due to the high amount of shortening or fat, in this case butter.  Think of 'shortcrust' pastry which is high in butter content and should also be crumbly.


But why 'bread'?  Most accounts have it that the original shortbread was indeed bread dough which was left over and then baked twice in the biscuit tradition with added sugar to make a sweetened and hard biscuit.

As time went on the bread was replaced by the simply flour, sugar and butter combination we know today.  This was of course more expensive and therefore reserved for special occasions such as weddings.


The rule of thumb for the quantities is 1:2:3.  Or 1 part sugar to 2 parts butter to 3 parts flour.  That's what I'm using here, but please adjust to your own taste.

If you research shortbread recipes you'll find a plethora of different quantities and ingredients.  Some call for plain flour only, others to mix in either cornflour, rice flour or semolina flour to bring an extra crunch.  A good pinch of sea salt brings an extra depth.


There do seem to be certain elements on which most people agree though.

  • Only 3 base ingredients?  Use good ones.  Decent caster sugar and good quality butter and flour.  
  • As it's short, don't work the dough.  It should be crumbly and melt in the mouth, overworking the dough will toughen it.  Bring it together quickly.
  • A short resting time in the fridge before baking helps the texture.
  • Shortbread should be pale so a low oven and longer cooking than more conventional biscuits.
  • There are 3 main shapes for shortbread.  The triangular petticoat tails, rectangular bars or a circular biscuit shape.


Here are 2 versions for you to try.  The first is using flour and cornflour while the second is using a flour and semolina flour mix.

Petticoat Tails

Ingredients

Cornflour

50g         Caster sugar + more for sprinkling
100g        Good quality softened butter
120g        Plain flour
30g          Cornflour
A pinch of good quality sea salt


Utensils

A mixing bowl
A wooden spoon
A 20cm removable metal cake tin base (Sides not needed, just the base)
A sharp knife
A fork

Method

Pre - heat your oven to 160 ° C conventional / 140 ° C fan.

Using the wooden spoon cream the butter and sugar in the mixing bowl until light and fluffy.

Sieve the flour, cornflour and good pinch of sea salt into the butter and sugar and bring together completely but working the dough as little as possible.  It should be soft and malleable at this stage.

Using your hands work it quickly into a disc to fit on to the cake tin base.  

Flatten off with a rolling pin if you like but make sure it is of an even height to ensure even cooking.

Crimp the edges of the disc using your finger and thumb.

Using the sharp knife mark the disc into 8 equal segments and then make holes using the fork prongs.


Let it rest in the fridge for 20 minutes or so until firmed up.

Place into your pre - heated oven and bake for 40 minutes.

Sprinkle with extra caster sugar and immediately cut into segments before it cools.  As it's heavy on the butter it will feel soft and pliable when warm.  Allow to cool completely before eating so as to get that lovely short and crumbly texture.


Bars

Ingredients

Semolina Flour

50g         Caster sugar + more for sprinkling
100g        Good quality softened butter
120g        Plain flour
30g          Semolina Flour
A pinch of good quality sea salt

Utensils

A mixing bowl
A wooden spoon
A 20cm removable metal cake tin base (Sides not needed, just the base)
A sharp knife
A fork

Method

Pre - heat your oven to 160 ° C conventional / 140 ° C fan.

Using the wooden spoon cream the butter and sugar in the mixing bowl until light and fluffy.


Sieve the flour, cornflour and good pinch of sea salt into the butter and sugar and bring together completely but working the dough as little as possible.  It should be soft and malleable at this stage.

Using your hands work it quickly into a rectangle.  I did use a rolling pin here to really flatten it evenly  


Divide it into even rectangles wide enough to take the fork marks.


Let it rest in the fridge for 20 minutes or so until firmed up.


Place into your pre - heated oven and bake for 40 minutes.


Sprinkle with extra caster sugar and immediately cut into segments before it cools.  As it's heavy on the butter it will feel soft and pliable when warm.  Allow to cool completely before eating so as to get that lovely short and crumbly texture.

Enjoy these with a wee dram of decent highland whisky.


That's what I'll be doing on Saturday as I raise a glass to Katie and Nick.


The Red Book Cook: Ciabatta Matters

The Red Book Cook: Ciabatta Matters: Imagine the scene…. A 19 th century Italian olive farmer in Puglia has finished his morning’s work in the grove and takes a rest un...

Ciabatta Matters

Imagine the scene….

A 19th century Italian olive farmer in Puglia has finished his morning’s work in the grove and takes a rest under a tree for his lunch.  He unwraps the cloth to reveal a crusty loaf of ciabatta stuffed with creamy soft cheese, ripe tomatoes and thin slices of ham.

A bread steeped in Italian tradition going back centuries, recipes passed down from Nonna to Mama through many generations, a taste of Italy unchanged for millennia...

Well, you can imagine all you want, but that’s nothing like the truth!

Ciabbatta is a 1980s child!  The same age as Prince William to be precise.

That’s right.  1982.  Bakers in Italy were concerned about the rising popularity of sandwiches made from imported French baguettes which was taking away their business.  So a passionate ex racing car driver named Arnaldo Cavallari retreated to his kitchens until he had created the recipe for Ciabatta. 

Naming it after the Italian word for ‘slipper’ due to its shape, a legend that has adorned delis and snack bars the world over was born.

Arnaldo Cavallari


And it’s good too.

Versions vary around Italy; in the north a crisper crust with a soft light crumb, in Tuscany a denser crumb with a more open texture is favoured.   Traditionally made with a strong wheat flour but it is varied with wholemeal flours and added flavours such as olives or marjoram.

It’s designed to be sliced horizontally along the loaf and not down like a traditional slice, the perfect sandwich shape.

Mixer with dough hook.


It’s made from a very wet dough, Cavallari says it should be an 80% hydration or 800ml of liquid for every 1000g of flour.  

That’s wet!  

Difficult to knead too, so a mixer with a dough hook is really required here. 


It’s also a bread which needs to be started the day before as it uses a pre - ferment called a ‘biga’ as a starter.  This is nothing too complicated, you simply mix together yeast, flour and water into a sloppy dough, cover and leave at room temperature overnight.  I usually make mine on a Friday or Saturday night if I know I can bake at lunchtime the next day.  

In the morning you have what looks like a bubbling liquid on the surface but is actually quite stable and elastic when you dive into it. 

The overnight process has allowed the gluten in the flour to start strengthening which some people believe was originally needed due to the lower protein content of traditional Italian flour.  The pre - ferment helped to develop the gluten more and thus give it a firmer texture.  It also gives the yeast time to work its magic and develop the all important flavour. 


The shaping of the final loaf is tricky in the home environment.  Pro bakers make it look very easy, flipping the dough from proving boards to baking trays with ease.  You need to make sure that you flour your surface well and use a decent dough cutter.  Try to get your pieces as even in size and shape as possible.  Don’t worry if they look a little flat at the shaping stage, they will puff up in the oven I promise!

Here I must credit Ballymaloe Cookery School for first introducing me to the process of how to make ciabatta and for this recipe.


Biga

Ingredients

7 g                   fresh yeast
400 ml             warm water
500g                strong white bread flour

In a large, non metallic, mixing bowl crumble the fresh yeast and pour on 50ml of the water, blood temperature is best.  Allow this to sit for about 10 minutes until it turns creamy and a bit frothy.  If you want to use dried yeast then just halve the quantity of yeast.

Then add in the rest of the water and the flour and mix really well with a wooden spoon.  It should come together into a gloopy, thick, pasty dough.  Cover this with cling film and allow to sit at room temperature overnight or for up to 24 hours. 

My biga
When ready the biga should have about doubled in size and have a beery fermented smell.

The Ciabatta

Ingredients

7g                    fresh yeast
400ml              warm water
1 tablespoon    olive oil
550g                biga
500g                strong white bread flour
15g                  salt

Take the bowl of your mixer and crumble the yeast into the bottom.  Add on 100ml of the warm water and let sit for ten minutes.  If using dried yeast, halve the quantity of yeast.

N.B. You can replace the 100ml of water with milk here and it becomes Ciabatta Al Latte.

Add in the oil, remaining water and the biga.  The remaining biga can be put into a jar and mixed in with your next batch for extra flavour.  Best to keep it in the fridge. 

Blend with the paddle beater until it is mixed through.  Then add the sieved flour and salt and mix for a further 10 minutes. 

Change the paddle to the dough hook.  Beat for about 20 – 25 minutes until it comes away clean from the side of the bowl and is a firm yet sticky stringy mass.  Get it mixing at the highest speed you can.  It will still be very wet at this stage.

Remove this to a big oiled bowl which is large enough so that the dough can expand.  Cover and leave at room temperature until it has doubled in size.  This should be between one and two hours depending on the conditions in your kitchen.

Flour your work surface well.  The dough is very sticky.

N.B. Do not knock back the dough!

Gently stretch and shape it to make an even slightly rectangular shape.  Using your dough cutter, cut into even size pieces and fold over on to itself to create that 'slipper' form.  This amount of dough makes 4 big loaves or 6 - 8 smaller ones depending on what you want.  

Flour your baking trays.  I'm actually using fine polenta at the moment which brings a lovely final crunch to the finished loaf.  

Gently get your loaves onto the tray, cover and leave to rest for about 40 - 45 minutes.

Pre - heat your oven 220 ° C conventional / 200 ° C fan.

When the loaves have rested for 40 - 45 minutes, dust with more flour and put them in the oven to bake for 20 - 25 minutes.

When done they should feel very light for their size and sound hollow when tapped.

Transfer to a cooling rack and resist the temptation to eat until cool.


Sunday, 28 September 2014

Buck The Trend. Bake Buckwheat Bread!


Fancy a beautiful slice of bread with a taste of Eastern Europe? 

Then buckwheat bread is a great alternative and tastes fantastic. Absolutely heavenly when toasted and slathered in honey.


It is also a great conduit for stronger more mature cheeses. 

Buckwheat flour has a quite distinctive flavour and beautiful earthy quality.  It rounds out the bread and brings a depth to the otherwise bland plain white wheat flour. 


Hugely popular in Ukraine, buckwheat is called ‘Grechka’ which comes from the Ukrainian for ‘Greek’ as it was introduced to Eastern Europe by the Greeks around the 7th Century.  

Despite the name, buckwheat is not a wheat, grain or grass.  It’s actually related to rhubarb and the kernels which are ground are technically a fruit! However, when ground these fruit behave much like a grain and therefore able to be ground into flour.  

High in minerals and fiber there is evidence that we have eaten buckwheat for around 8,000 years.

The etymology of buckwheat comes from the fact that the large seeds resembled large Beech tree seeds.  Sanskrit for Beech is ‘Buk’ which is how we get ‘Buckwheat’. 

I am using a ratio of 4:1 of wheat to buckwheat flour here.  You can alter that ratio but be aware that buckwheat flour has no gluten in it which will mean the higher the ratio of buckwheat the less elasticity you will have in the crumb. 


I am using a higher water content here in comparison to the Basic White Bread recipe so I’m using the mixer which makes it easier to knead the wetter dough.  That’s also the reason why I’m letting it sit before kneading for a longer period.  You can do it by hand but you’ll need to persevere!


I recommend reading my post on White Bread for the background on all the basic bread techniques you need to get great bread. 


Ingredients

400g Strong baker’s flour
100g Buckwheat flour
7g or 1 sachet of fast acting dried yeast
350ml water at room / blood temperature
9g salt
18g caster sugar
25g cold butter

Utensils

A large mixing bowl
Electric mixer with dough hook
Electric weighing scales
2 wicker bannetons
Baking tray
Cooling rack


Begin by sieving your two flours together into the mixing bowl.  Add in the salt, sugar and dried yeast. 

Rub the butter into the flour so it all disappears. 

Make a well in the bottom and add in your water.  Reserve a little just to make sure you get the right consistency.  You should be able to collect all of the flour and liquid together into a complete shaggy mass with no extra flour left around the bowl.

Turn out onto your work surface and allow to sit, covered, for at least 10 minutes for the moisture to absorb as much as possible before kneading.  For this recipe I left it to sit for one hour.

Now transfer the dough to the electric mixer, attach the dough hook and mix until you have a soft, elastic and pliable dough.  For me this was just under 10 minutes. 

When you are happy, return to a lightly oiled bowl and allow to double in size at room temperature.

When doubled in size knock back and remove from the bowl.  Using your scales divide the dough into equal sizes according to how you are going to do your final prove.  This amount gave me two 425g loaves.

I shaped each into a ball by gently flattening the ball and then folding the edges to the middle.  Then turn the ball over so the rough folds are at the bottom.  ‘Cup’ the ball at the bottom with both hands on either side and rotate the ball thereby aligning the bottom.

Line each banneton with a clean and floured tea towel.  I used a coarse semolina here which gave me a delicious extra crunch to the final loaf.

I then turned the ball upside down into the floured tea towel in the banneton as I will later turn it onto the baking tray back on to the under side. 

Leave to prove for a second time until risen again.  This will be a shorter time than the first. 

Pre heat your oven to 220 ° C conventional and place your baking tray in the oven.  If you are using a steam bath technique put your empty tray under to heat up as well.

The dough is ready when you press a finger gently to dent the dough and the dent remains.

Remove the baking tray from the oven and sprinkle with a little flour.

Now turn the dough onto your pre heated and floured tray, spray with water, sprinkle with more flour and then very lightly carve a line in the top with a very sharp knife.  

Return to the oven with a big spray of water into the oven or pour cold water onto your heated tray in the bottom of the oven. 

Bake for 10 minutes on 220 ° C then turn your oven down to 200° C for a further 35 minutes.  A total of 45 minutes.

Remember that ovens vary so take them out when they are done, not simply at the end of the cooking time.  Bake the loaf not recipe!

You want your loaves coloured on the crust, feeling ‘light for the size’ and sounding hollow when tapped.  Those three indicators should do you well. 

Transfer to a cooling rack and leave until cool.  Don’t be tempted to slice open before they are cool!


Bon Appetit or ‘Smachnova’ as we say here in Ukraine.


Sunday, 21 September 2014

White Bread, White Choice?

There are so many delicious and varied types of bread that we can bake at home using different techniques, flours and extra ingredients.  I’ll be honest with you, basic white bread isn’t the most interesting, tasty or healthy choice you can make when baking your own bread.  So when learning to bake bread why on earth bother with a plain white loaf with a single type of boring white flour and no whistles and bells?

That’s the point. 

There is nowhere to hide with a plain white loaf.  You have to get your techniques absolutely right and have a sound understanding of how your ingredients work.  It is a great arena for learning how yeast behaves and why.  How to knead?  Why knead?   What is really going on when we prove dough?  What happens when a loaf is put in the oven? 

If you can get the basics right on a simple white loaf then the bread baking world becomes your oyster.

But by the way, it’s not that simple!

Let’s take a quick look at our ingredients...

Flour

Flour contains a variety of different substances including protein, sugar, enzymes starch and lipids.  Different flours contain these base substances in different quantities depending on what the flour is milled from, for example wheat flour has a lot more protein than rye flour. 

You need what is called a ‘strong’ flour or ‘baker’s flour’.  It’s strong because it comes from wheat that is hard due to a high protein content compared to starch content.  This means that when kneaded the hard proteins form strong bonds which create that lovely chewy crumb texture we get with a decent white bread. 

Compare this with a cake crumb where a ‘soft’ or plain flour is used.  Here the flour has a much higher starch content which results in the tender crumblier crumb instead of chewy.  We hope!

Two of the natural proteins in bread are gliadin and glutenin.  Repeated stretching unfolds and then aligns these two proteins and forms ‘gluten’ strands.  This makes your dough silky and elastic.

The etymology of the word gluten is from the Latin word for ‘glue’ so it’s no surprise that it’s the gluten which holds the bread together in the structure we associate with white bread by trapping the gas bubbles created by the yeast which in turn forms the crumb.  

When dormant the gliadin and glutenin molecules are a tangled mess.  When water is added and kneading takes place the molecule structure changes from tangles to straight and aligned.  Hey presto,  gluten is formed.


 Yeast

Wow.  Yeast is quite a thing and arguably the earliest domesticated organism.  The etymology comes through Indo European ‘Yes’ and Old English ‘Gist’ meaning to boil or bubble.  And bubble it does. 

It’s actually a fungus which comes to life with water and a little warmth and then feeds on the natural sugars in the flour.  As it feeds away it burps out carbon dioxide which manifests in little gas bubbles.  It’s these bubbles which give air around the glutinous structure of the dough and cause the bread to rise.

There are many types of yeast and it deserves a whole post to itself, but here I’ll concentrate on a single type.  Fast acting dried yeast.  I’m choosing this type as it’s readily available and the easiest to use.  Not that I’m a believer in the easy route but it’s a good way to start out and once mastered you can quickly progress to using fresh yeast.


Water

A lot is written about the temperature the water should be.  I have found that a blood temperature works well.  Simply dip your finger into the water and if it feels that there is no change it’s the same temperature as you.  Or your blood!

Sugar

As we know yeast eats sugar and gives off gas which is what we want to make the dough rise.  Be careful though as too much sugar can actually inhibit fermentation.  It can also affect the development of the gluten in our dough as it competes with the protein to absorb water.  If you have ever made a sweet dough you know that it takes longer to form for this very reason.

It’s also partly the sugar which gives our bread the lovely brown crust we are looking for.  Something called the Maillard Effect where sugars turn brown when heat is applied and create depth of flavour.  That brown crust in bread gives the whole loaf extra depth and is really important to your final product.

You might wonder why a lot of commercially produced breads contain so much sugar?  The answer is that the traditional way of bread baking takes time, care and artisan skills.  Something which is incompatible with commercial bakeries because time, care and artisan skills are expensive.  So instead of allowing a long proving time they replace the flavour developed during a real proving with artificial flavourings and sugar.  Much cheaper and no skill required. 

Salt 

Salt is a flavour enhancer.  This means that used in the right quantities it makes your food taste even more like itself.  Tomatoes become more ‘tomatoey’, meat more ‘meaty’.  I could go on....

You might think, as I used to, that salt is added only for flavour.  But no.  It has another important role to play in the proving process.    Like sugar, it actually inhibits the yeast activity making the dough rise more slowly and evenly.  This creates more flavour. 

As it inhibits the yeast eating up all the sugars, salt therefore helps to make sure there are more sugars around to give us that brown crust we are after.

Furthermore, the addition of salt makes the dough stronger as it has a dehydrating effect and tightens the structure.  If you make a dough without salt but the same ratio of flour to water you’ll notice the saltless dough is stickier and more likely to rip when kneading.

As a guideline, 1.8% salt to the dry weight of flour is about right.

Butter / Oil

There is much discussed about the benefits of oil or butter added to the dough. 

It is widely accepted that the addition of fats will result in a more tender crumb and an extended shelf life.  French baguettes have no fat in them and so don’t last as long as those that do.  A lot of people argue that bread shouldn’t have a long shelf life anyway and the ability for supermarket breads to last for the length of time they do is positively alarming!

I’m using butter rubbed in at the dry stage here but I sometimes use olive oil worked in at the kneading stage which brings extra flavour.  


Now let’s have a look at the crucial stages and processes in chronological order...

The mixing

It sounds obvious but what you are after here is an even distribution of all your ingredients. 

To this end, use a ridiculously large bowl.  The bigger the better.  A simple plastic washing bowl is perfect, if you can get one with a slightly abrasive surface it aids the process. 

At this point it is important to let the dough rest in its shaggy mass before you start to knead.  This gives the flour time to absorb the water so the dough is less sticky and therefore you are not tempted to add more flour.  If you have got your quantities right you shouldn’t need to flour your surface during the kneading process.  Do remember however that different flours absorb different amounts of liquids in different atmospheres.  You might need to adjust the amount, remember to get an understanding of what the right dough feels like rather than blindly following the recipe.

N.B. There is much written about the ‘autolyse’ method developed by Raymond Calvel the daddy of French breads which involves letting the dough rest at this stage without the addition of the salt, sugar and yeast.  He’s worth looking up.
Raymond Calvel

The Kneading

Kneading develops the gluten which we need for the texture of good bread. 

Furthermore, the kneading traps air pockets which hold the carbon dioxide given off by the yeast and provides the structure which allows the bread to rise. 

Your dough is kneaded enough when...

  • It’s a nice smooth consistency.  Soft and pliable to the touch.
  • It holds its shape.  The gluten strengthens the dough so it should retain its shape when picked up.
I have found that the best technique is to hold one side of my dough with the heel of my left hand and then stretch the other side away from me with my right hand.  Then roll the dough back towards me into a ball again, give it a quarter turn and then repeat.

Under kneaded dough will retain the shaggy mass form and will tear easily.  It will not have the strength it needs to hold the gases and structure of the loaf when baking and will therefore spread outwards rather than up and be rather flat.  It may even collapse as the gases escape the loaf due to the gluten not holding them in.

Over kneaded dough will go through the correct silky soft elastic stage and then become tough.  It will feel tight and you won’t be able to fold it over on itself very easily.  This is almost impossible to do if kneading by hand.  It’s only with a mechanical mixer that you could work the gluten too much.  A good reason to roll up your sleeves and do it the natural way.

Then we leave it to ferment...


The Rising

The dough is covered to avoid moisture loss and left to rise. 

All the tiny yeast cells feed on the natural sugars and give off, among other things, gas.

The ideal temperature for this to happen is actually much lower than most people think, about 80 ° F / 27° C.  So don’t put in on a radiator or in the airing cupboard.  In fact many believe that the lower the temperature; the slower the rise, the tastier the bread.  I have often let my dough rise in the fridge overnight with good results.   

It’s been shown that yeast produces gas ‘faster’ up to 95° / 35° C but it also tends to produce more unpleasant smelling byproducts as well.  So be patient and let nature work its magic in its own time.

When is it ready? 

  1. It should be about double in volume. 
  2. When poked with a finger it should not spring back.  This means that the gluten has been fully developed.

At this point ‘knock back’ the dough by punching all of the air out of it.  This redistributes the yeast evenly as well as evening out the temperature.

The dough is then shaped into the form you want to bake it in and, with strong flours, left to rise a second time.  This is usually a shorter time.

The Baking

The first thing that happens when you put the dough in the oven is that the yeast has one last hurrah before the heat kills it dead.  This is called ‘oven spring’ and manifests itself by a quick rising of the loaf. 

Two very important things then happen at the same time.

  1. The gluten coagulates and the starch gelatinizes to create the solid crumb we know in bread.
  2. The crust starts to form on the outside of the loaf and create a crunchy seal.

This is really important when it comes to your oven temperature.


  • If your oven is too cool then the dough expands before the gluten and starch have set causing the loaf to collapse as there is no solid structure to hold the dough.


  • If your oven is too hot then the crust will seal the loaf preventing your dough from expanding resulting in a poorer texture.

The crust of the loaf should brown nicely which bring flavour to not only the outer edge but permeates through the whole loaf.

Your bread is cooked when it sounds hollow when tapped and feels ‘light for its size’.

The Cooling

When the loaf comes out of the oven the crust is super hot and dry and the centre is cooler and moist.  The bread needs to rest so the temperature evens throughout and the starch has a chance to solidify.  Don’t be tempted to cut in too early!