Saturday 24 October 2015

Blessed are the Cheesemakers


Caerfai Farm Cheddar and Caerphilly


Historically, cheese making dates back at least 5000 years.  No one can be sure exactly how it came into being but most theories suggest that it began with our discovery that animals could be milked.  Who that person was and what they thought they were doing at the time is still a mystery.

Once obtained, the milk had to be stored.  A common receptacle would have been the stomach of a ruminant which could then be carried on horseback.  Unknown to these early nomads, ruminants' stomachs contain an enzyme we know today as rennet which coagulates milk making it easier for the baby animal to digest.  The rocking motion of the horse churned the milk combined with rennet resulting in a separation of thick curds and watery whey.  The whey made a refreshing drink and the curds provided an easily consumed high protein meal. 

This simple process is still used today, if you heat milk and add an accidulant such as lemon juice the curds will separate and you can press them to make fresh cheese.  Herbs or sweeteners can be added, or it can be formed to make cheeses such as paneer.

In the middle East, salt was added to help preserve the cheese resulting a somewhat hard and rather tasteless base product.  However, in Europe the natural bacteria in the atmosphere and less need for salt due to the cooler temperatures meant the cheese could be matured for longer resulting in a deeper and more pronounced flavour.  The bacteria unique to the area would provide a regional cheese. 

And this process has remained very similar amongst artisan cheese makers to this day.  One such producer worthy of note is the Caerfai Farm in St David's, Wales. 


Located just metres from the Pembrokeshire coastline, Linda Evans has been producing three types of quality artisan cheese on their 180 acre organic dairy farm since 2004 when she took over from her father who had first produced cheese in 1996.


To hear Linda talk about how she produces cheese you wonder why everyone isn't doing it, she makes it sound deceptively simple.

Their organic raw (unpasteurised) milk is warmed and a vegetarian rennet added to start the coagulation.  At this point a starter culture is also added.  This is to replace the bacteria which would have originally been in the atmosphere and provide the flavour or character of the cheese.  These are easily bought nowadays and are usually under the generic label of 'type'; 'cheddar' type or 'brie type', for example.

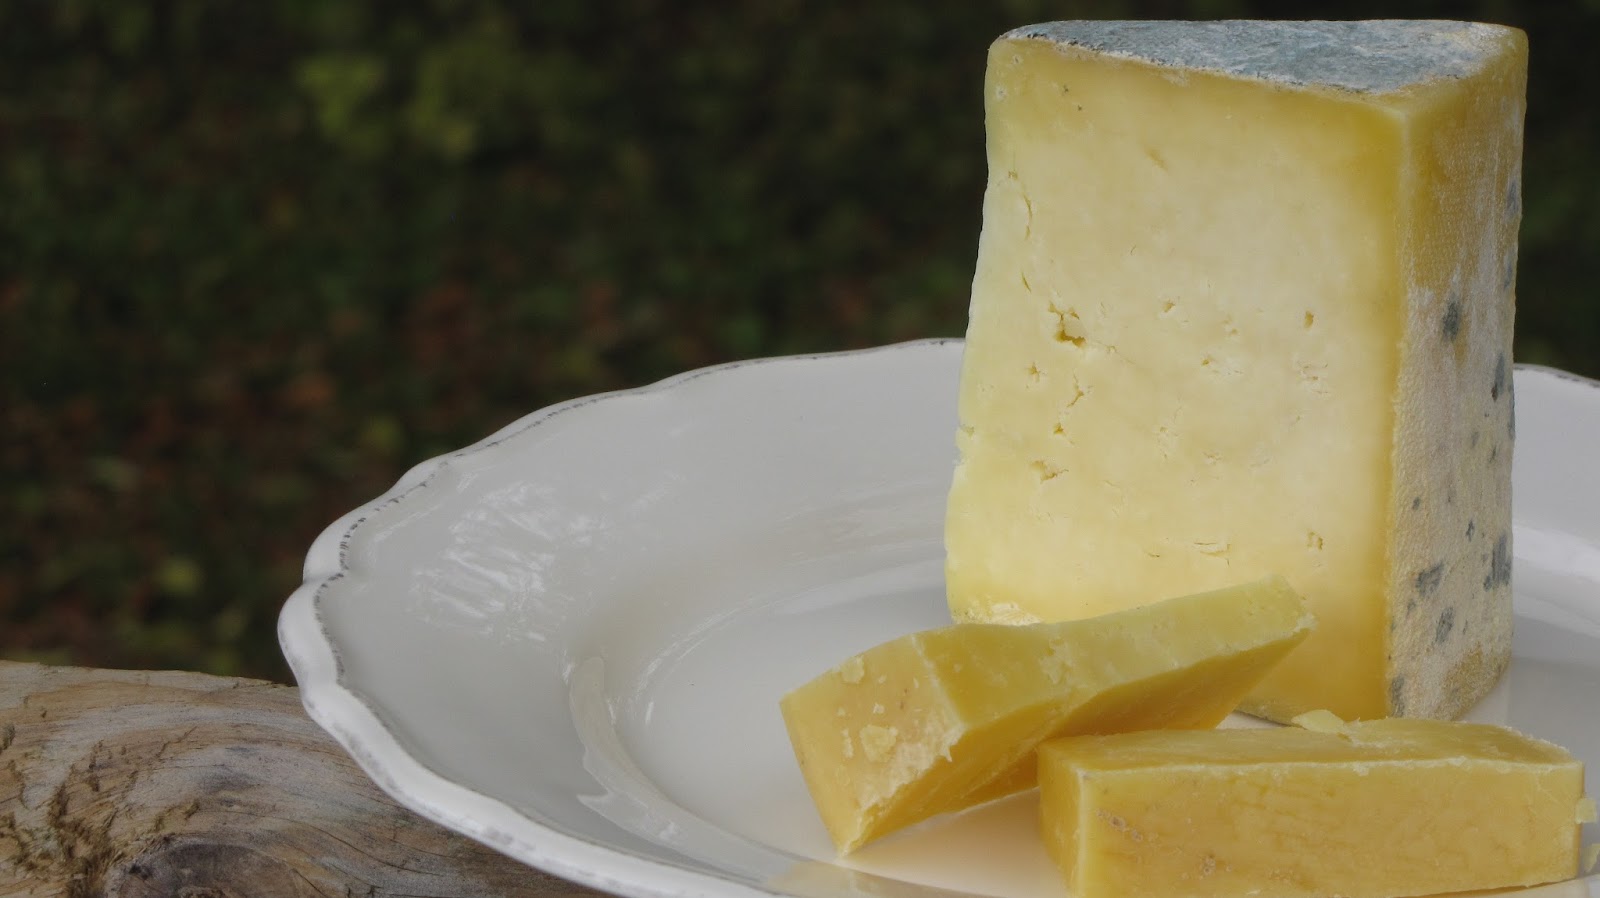
She then separates the curds from the whey and grinds the curds into a finer mix which is known as 'cheddaring'.  The curds are then placed into a mould and left to set before being turned out and wrapped in a muslin cheese cloth.    An interesting note here is that Linda used to employ a traditional method of sealing the cheese with lard instead of cheesecloth.  However, this created such an effective air tight seal that a blue-ish vein developed which people then associated with other types of cheese and not cheddar.


Caerfai Cheddar maturing

For the Caerphilly the process is similar only a different starter culture is used, the cheese is brined for 24 hours after being unmoulded and it matures for a maximum of six weeks, Linda recommends an optimum time of three weeks for the best flavour. 
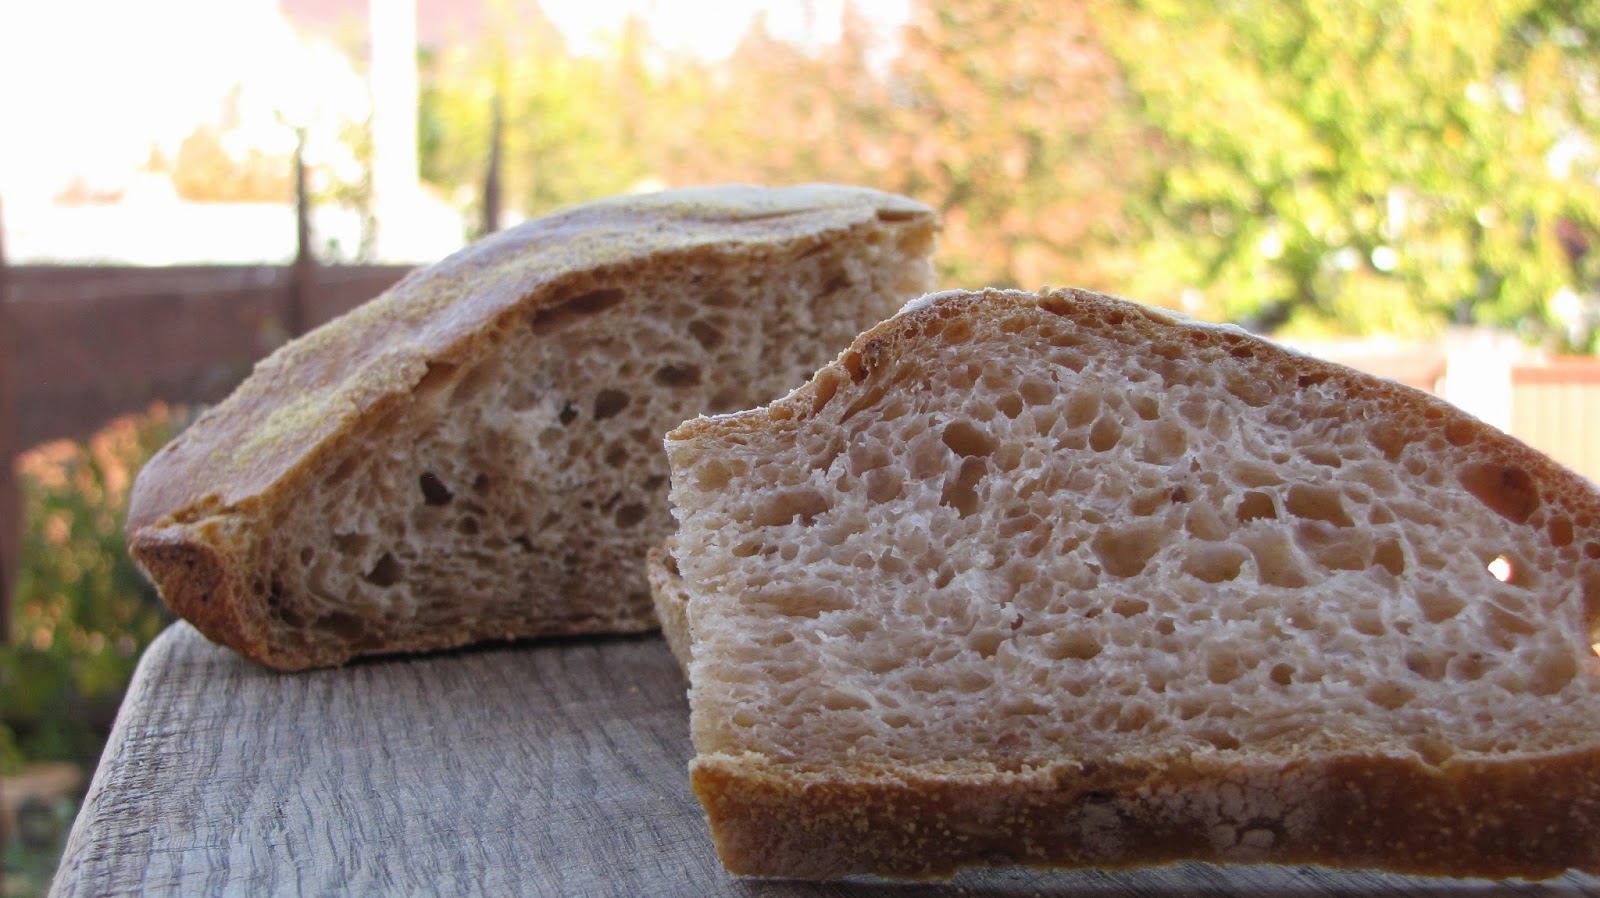
Caerfai Caerphilly


There are a few points to note about Linda and Caerfai which are a sign of the real artisan and should be a benchmark for all our food producers.

Firstly, Linda was very generous with her time and showed me around the whole dairy talking me through the process of how she produces her cheese.  The ability to meet the people who produce our food is something which is becoming increasingly rare leading to a lack of knowledge about what we eat and drink. 

Secondly, the quality of their cheese comes before a desire to make a huge profit. There are only 60 cows on Caerfai farm, not many for 180 acres.  However, they want to keep the best possible environment for their cows giving them enough space to live a natural life.  Happy cows produce better milk which produces better cheese. 

Finally, they know what they are talking about.  As we increasingly outsource the production of what we eat to huge multinational companies we are left with very few who really understand the history or what it takes to make that product from beginning to end, people who understand the importance in the quality of every ingredient and step in the production.  Linda and Caerfai represent all that is good about food production and what we need to maintain our glorious food culture.

And what a cheese they make.  Their cheddar is absolutely to die for, a depth of flavour which is striking and a gorgeous back note with a nutty finish.  The Caerphilly is a softer cheese on the palate due to it maturing for a maximum of six weeks as opposed to the seven to eight months for the cheddar. 

If you are in Wales look out for Caerfai Farm cheeses and support a real artisan producer of really good quality food.

www.caerfaifarm.co.uk


Sunday 21 June 2015

Patisson and Basil Bread


Anyone who has grown squash of any kind knows how quickly they can grow and how soon you have a glut and need to think of interesting things to do with them.


Patty Pan


My patty pans came through about two weeks ago and I've been loving them lightly grilled with a little sea salt and nothing else.  Identifiable by their distinctive crimped edges, the French name for patty pan is patisson which comes from a word for a cake made in a scalloped mould.  They have an almost creamy flavour and are best picked small.  However, today I noticed this 400 gram monster which had been hiding from me and I knew it was time to dream up something different.


Right next to my patty pan and courgette beds my basil is growing great guns, so I thought I would create my own version of the slightly better known courgette bread.  It works well as it packs in extra flavour, but also a beautiful moistness. It's fairly easy on the eye with the colourful basil running through it as well.

Fresh Basil


One thing to note here is that the patty pan brings extra liquid, therefore increasing your hydration.  Using a 65% hydration as I am here, plus the squash gives you a ciabatta like consistency for your dough.  This means you really need a mixer.  If doing it by hand you either need to squeeze every last drop of moisture from the patty pan or reduce your hydration.

The higher hydration gives this bread a beautiful soft open crumb

You can of course experiment with the amount of patty pan and basil.  I'm using 15g of fresh basil which gives quite a nice light complimentary flavour.  Remember that my basil was 30 seconds from picking to chopping, if you are using basil that's not quite so fresh you may need to increase the amount.

I'm using the basic recipe for white bread for this recipe.  All I'm doing is adding in grated patty pan and finely chopped basil to the dry ingredients and continuing on as normal.  Please read my post on 'White Bread White Choice' for all the details on ingredients and techniques.  It will also be handy to read the 'Ciabatta Matters' post for notes on dealing with higher hydration breads.

Ingredients

500g strong baker’s flour
200g grated patty pan
15g chopped fresh basil
7g of fast acting dried yeast
325 ml water at room / blood temperature
9g salt
12 g caster sugar
15 ml vegetable oil

Utensils

Bread mixer with dough hook
Electric weighing scales
Dough cutter
Baking tray
Cooling rack


Begin by sieving your flour into the bowl of your mixer.  Add in the salt, sugar and dried yeast. Give it a mix.

Add your grated patty pan and chopped basil

Make a well in the bottom and add in your water and oil.  

Turn on your mixer, slowly at first and then start to speed up.  You may need to use a rubber spatula to get all the flour incorporated.  Once mixed, turn the mixer up high.  It will look wet and you will think at first that it will never come together.  Have faith and it will.  It took me almost 20 minutes.  What you are looking for is the the dough to come away cleanly from the sides of the mixing bowl as it's mixing.  When you stop the machine and lift the dough hook you should be able to stretch your dough even though it's so wet.

It's a wet mix!

When you are happy, return to a lightly oiled bowl and allow to double in size at room temperature.

Using your scales divide the dough into equal sizes according to how you are going to do your final prove.

I’m doing three loaves so my 1050g of raw dough went into three loaves of 350g. 

Prepare your cold baking tray.  I dusted mine with fine polenta as I like the crunch it brings but you can use flour.

Pre heat your oven to 220 ° C.

Wash and wet your hands between forming each loaf.  This will mean the dough will not stick to you.

Using your dough cutter, cut and weigh the right amount.  For me 350 grams.  Give it a quick stretch, fold it over on itself and then shape into your desired shape.  Lay on to the prepared tray.  Liberally sprinkle flour on top. 

Shaped
Floured and ready to prove


Cover and leave to prove again.  Depending on the weather and temperature of your kitchen 40 - 45 minutes.  Don't expect a massive doubling in size from this one. 

Transfer to the oven.  

These three loaves took 30 minutes but remember that all ovens are different so use your judgment.  You want a loaf which is coloured on the crust, feels ‘light for the size’ and sounds hollow when tapped.  Those three indicators should do you well. 


Transfer to a cooling rack and leave until cool.  Enjoy with something nice, like a decent sauvignon blanc to compliment the basil. 


Friday 28 November 2014

Khorasan. A bread of biblical status


Also called ‘Camel’s Tooth’, ‘King Tut’s Wheat’ or the ‘Prophet’s Wheat’, Khorasan is a grain shrouded in mystery and legend.


Among Turkish farmers who still grow this ancient wheat, there is a rumour that Khorasan is the wheat that Noah took on the ark.


Many believe that it originated in what is now called the ‘fertile crescent’ in the Middle East, and takes its name from the Persian province of Khorasan in what is today northern Iran.  The name ‘Khorasan means ‘where the sun arrives from’ in Persian. 


Legend has it that it was the wheat that fed Pharaohs in ancient Egypt.  Indeed, it is commonly accepted that Khorasan was introduced back into modern times by an American airman in 1949 who obtained just a handful of grains from King Tut’s tomb in Egypt and brought it back to Montana in the US where he began to cultivate it. 

King Tut
Whether the kernels would be able to germinate after thousands of years is most definitely open to question.

But how can you resist baking a bread from a grain with such a history?

Believed to be a very close relation to modern day durum wheat which is often used for pasta, Khorasan is an ancient grain which contains far more goodness than its contemporary equivalents.  This is because it has been cultivated and modified less and therefore retains more nutrients.  Many people who have trouble digesting wheat breads find Khorasan much more agreeable.  Nutritionally it boasts 30% more protein and 65% more amino acids than standard wheat as well as being rich in Vitamin E, zinc and magnesium. 


You can see here that the flour is robust and a little coarse.  It has a very slightly nutty smell to it.


Khorasan flour


I’m using fresh yeast here but you can use dry or fast acting.  Just use 7g instead of the 14g of fresh.  The honey can be replaced with sugar if you wish.

This is quite a wet mix so you do need the electric mixer.  If you want to do it by hand then reduce the water by about 20ml to make it easier to knead.


Ingredients

250g Strong baker’s flour
250g Khorasan flour
14g  Fresh yeast
375ml water at room / blood temperature
9g salt
18g Honey
15ml Sunflower oil

Utensils

A large mixing bowl
Electric mixer with dough hook
Electric weighing scales
Baking tray
Cooling rack


Dissolve the fresh yeast in about 100ml of the room temperature water.  Add in the honey to the water.  Leave for around 10 minutes.

Sieve your two flours together with the salt into the mixing bowl. 

Add your oil to the water, yeast and honey.

Make a well in the bottom and add in your water.  Reserve a little just to make sure you get the right consistency.  You should be able to collect all of the flour and liquid together into a complete shaggy mass with no extra flour left around the bowl.  This will be quite a wet mix.

Cover and let sit for at least 10 minutes for the moisture to absorb as much as possible before kneading.  Up to an hour if you can.

Now transfer the dough to the electric mixer, attach the dough hook and mix until you have a soft, elastic and pliable dough.  Up to 10 minutes. 

When you are happy, return to a lightly oiled bowl and allow to double in size at room temperature.

When the dough has doubled in size knock back and remove from the bowl. 

Shape into a ball and place on a lightly floured baking tray.  Dust with flour and then cut a cross into the top with a sharp knife. 

Leave to prove for a second time until risen again.  This will be a shorter time than the first. 

Pre heat your oven to 220 ° C conventional and place your baking tray in the oven.  If you are using a steam bath technique put you empty tray under to heat up as well.

The dough is ready when you press a finger gently to dent the dough and the dent remains.

Return to the oven with a big spray of water into the oven or pour cold water onto your heated tray in the bottom of the oven. 

Bake for 10 minutes on 220 ° C then turn your oven down to 200° C for a further 30 minutes.  A total of 40 minutes.

Remember that ovens vary so take them out when they are done not simply at the end of the cooking time.  Bake the loaf not recipe!

Remember…

  • loaves coloured on the crust
  • feeling ‘light for the size’
  • sounding hollow when tapped. 


Enjoy this and know that you are eating something similar to what nourished the ancient kings of Egypt.


Sunday 23 November 2014

The Red Book Cook: Unleash the Yeast!

The Red Book Cook: Unleash the Yeast!: Ladies and Gentlemen, I’d like to introduce you to   Saccharomyces Cerevisiae.  You want to make bread?  You need to get to know her a lit...

Unleash the Yeast!

Ladies and Gentlemen, I’d like to introduce you to Saccharomyces Cerevisiae.  You want to make bread?  You need to get to know her a little.


Saccharomyces Cerevisiae

I say 'her' for a good reason.  Let me paint you a picture; millions of years ago when the dinosaurs walked the Earth, some plant species developed an ingenious method of spreading their seeds a widening distance.  

They wrapped them in a sweet tasting flesh which birds loved to eat, seeds and all.  The seeds were then deposited a set number of hours later a good distance away.  The birds were kind enough to leave an appropriate amount of fertiliser as part of the deal to help the seeds get started.

Stay with me here...

Not long after that an entrepreneurial fungus realised that it could latch on to the fruit and feed away devouring the natural sugars on its skin using oxygen to convert the sugars to carbon dioxide.  Should no oxygen be available then it fed anyway, but transformed the sugars into alcohol.  

This clever little fungus multiplied by 'budding', or creating daughter cells.  Hence, 'her', she's lexically female.  

Sometimes this budding process enabled them to create alcohol whether oxygen was present or not.   As alcohol is a poison, this helped the fungus to kill off its rivals and therefore maintain a serious advantage.   

That's why decomposing fruit smells alcoholic.  Could this be why humans have a penchant for alcohol?  Our ancestors associated it with sweet, heavily ripened fruit, the world's first alcopop! 

In more contemporary times, this fungus' ability to create alcohol has been used to brew beer and its ability to to give off carbon dioxide to leaven bread.  This amazing fungus is what we refer to today as 'yeast'.

Yeast is truly remarkable stuff, a fungus which exists around, on and in us.  There are thousands of recognized types and is arguably the world's first domesticated organism.


So how have humans put it to use?


The first breads leavened by yeast would have been through pieces of dough left over from the previous batch of bread in which the natural yeast in the air had started to ferment naturally.  The word 'ferment' derives from the Latin 'fervere' which means 'to boil' or 'seethe', which is exactly what yeast appears to do when activated.

Throughout history there have been many different approaches to harnessing yeast to leaven breads.  The ancient Egyptians first used left over dough then progressed to using beer froth or 'barm' which of course had yeast in it. You now know the etymology of the word 'barmy'.  Barm was so important in the middle ages that it was referred to as 'goddisgoode',  because it was made with the blessing of God.

The Romans would mix grape juice with wheat bran, allow it to ferment and form into small cakes which were dried in the sun.  These cakes could be soaked in water to reactivate the yeast when needed.  

Basically, a sloppy mix of natural yeast, flour and water was used to leaven breads for centuries.  This is what we know as 'sour dough starter' today.  No one really knew why this worked or that yeast was in fact, alive.  

Right up until 1859 when Louis Pasteur proved how yeast operates.    

Louis Pasteur


Pasteur was the first to show how yeast is a living organism.  This led to the ability for scientists to cultivate the cells, concentrating them into a block and then taking the water content away from the original sludgy mixture.  This block or 'cake' is what we would recognise as 'fresh yeast' today.

However, fresh yeast has a very limited shelf life.  During the second world war there was a need for a yeast with greater longevity.  It was reduced to small granules, dried, and a natural coating was allowed to form around the granule, thus enabling it to be kept indefinitely.  Much like the ancient Roman version it is reactivated in water.  This is what we know as 'dried yeast' today.

To make life even easier, these granules were reduced in size so that they could be added straight to the dry mix of flour with no 'pre - rehydrating' necessary.  This is what we know as 'fast acting yeast' today.


So how does yeast actually work?


It's a living organism.  Like all living organisms, it feeds.  Yeast feeds predominantly on sugars which can be found naturally in flour.  When water is added to the flour, enzymes immediately break down the starches and release sugars which the yeast feeds on like Cookie Monster with the munchies.  

As the yeast feeds on the sugars it produces alcohol and carbon dioxide in the form of bubbles which raise the dough.  The gluten in the dough forms around the bubbles creating the texture of the final bread.  This stage is called 'proving', 'proofing' or sometimes 'blooming' the dough.

According to Harold McGee, the optimum temperature to raise dough is 27° C, much lower than most recipes suggest.  In fact, the longer the yeast takes to raise the dough the tastier your final bread will be.

Yeast will work faster at warmer temperatures but will also secrete more unpleasant by-products.  So give it some time and prove at a cooler temperature.  This is called 'retardation' and often used by skilled artisan bakers.

Yeast is a tough little thing too.  The only thing that will kill it is a temperature of 140° C or the 'Thermal Death Point'.  When frozen it becomes dormant and simply awaits reactivation.

When you put your loaf in a hot oven you will see it immediately rise, this is called 'oven spring' and is the result of the yeast's swan song, its farewell performance before it dies.  This is essential for your bread to have a decent crumb and one of the reasons why your oven needs to be hot enough to get a good rise.   

Much is discussed and written about whether dried or fresh yeast is better.  In my experience it is far more about the other ingredients, baking technique and hydration levels which affect the quality of the finished loaf.


There are four main types of yeast that I use for baking bread. Let's have a look at your options.


Fast acting dried yeast


Fast Acting Dried Yeast

This is the quickest and easiest yeast to use.  No need to start it up in any way so when you need to knock up a loaf quickly it works a treat.  It doesn’t bring any extra flavour the way sour dough starter can so I use it with loaves containing flour with some flavour of its own such a nice malted wholemeal.

Simply sprinkle the yeast straight into your dry ingredients before adding your liquid. 
That’s it, couldn’t be easier.


Dried yeast


Dried Yeast


Larger granules than the fast action yeast, this needs to be activated in water before use.  Put the yeast in a bowl and cover with some of the water you have measured out for your bread.  Remember not to use extra water on top of the specified amount in the recipe or it will affect the hydration balance.


Fresh yeast


Fresh Yeast

Usually sold in a block, fresh yeast should have a 'fresh' smell, be moist, soft and crumble easily.  The light ivory colour should not have any dark patches or discolouration.  Once opened, fresh yeast needs to be used up quickly.  However, I buy in small packets and immediately freeze.  Crumble the yeast into a bowl and cover with some of the water you have measured according to your recipe.    


Sour dough starter


Sough Dough Starter
Using the natural yeasts in the air, sour dough starter is the most natural method for leavening breads and brings amazing results.  It takes time to create, look at my post 'Sour Dough Rules' for a more in-depth description of the process. It will keep in the fridge under the right conditions for years.  It is most definitely the trickiest to master but brings fantastic results.


So there you have it.  All you need to know about yeast.  Time to get in the kitchen and start baking!


Sunday 26 October 2014

Let’s do vegan bread and support Animal Balance!

With a Rye Smile…


My friend Emma from Animal Balance asked me to do a post on vegan bread.  It’s actually very simple, I substituted the butter for sunflower oil and we’re done.  Vegan friendly.

I made sure there is a liberal amount of seeds on the top so she can get some protein and thought I would go with the addition of rye flour for extra flavour.

Rye breads have been around for thousands of years.  The Vikings used to make an unleavened variety with a hole in the middle which could be hung up for storage. This meant that the bread could last for years!

Viking Rye Bread


Rye is closely related to wheat but has much less gluten.  What gluten it does have traps air bubbles poorly so don’t expect so much of a rise.   If you make bread with only rye flour it is dense with very small air bubbles.

A closer crumb

However, rye has more sugars than wheat, so rye dough ferments faster so watch the rise!

You can buy a variety of different types of rye flour.  Some are very pale as they have been refined and don’t include the bran or germ form the original kernel.  Others become darker and more packed with nutrients as more of the bran and germ is left in.

The added teaspoon of malt here gives a great depth but can be omitted if you don’t have it. 

This is a really good example of how you can experiment with your bread once you have mastered the basic white bread technique.  The procedure here is the same, but with 20% of the wheat flour replaced with rye and hydration increased to 65%.  Once you get the basics right you can start experimenting for yourself with different flours and loaf shapes.

Ingredients

800g Strong baker’s flour
195g Rye flour
5g Malt
14g or 2 sachets of fast acting dried yeast
650ml water at room / blood temperature
18g salt
36g Caster sugar
30ml Sunflower oil
Seeds for topping

Utensils

Large mixing bowl
Electric mixer with dough hook
Electric weighing scales
2 large wicker bannetons
Baking tray
Cooling rack


Sieve your two flours together into the mixing bowl.  Add in the salt, sugar and dried yeast. 

Add your oil to the water.

Make a well in the bottom and add in your water.  Reserve a little just to make sure you get the right consistency.  You should be able to collect all of the flour and liquid together into a complete shaggy mass with no extra flour left around the bowl.

Cover and let sit for at least 10 minutes for the moisture to absorb as much as possible before kneading.  Up to an hour if you can.

Now transfer the dough to the electric mixer, attach the dough hook and mix until you have a soft, elastic and pliable dough.  About 10 minutes. 

When you are happy, return to a lightly oiled bowl and allow to double in size at room temperature.

Meanwhile, flour your bannetons well and throw in liberally your choice of seeds.  I’m using a mix of sunflower and pumpkin seeds here.

When the dough has doubled in size knock back and remove from the bowl.  Using your scales divide the dough into equal sizes according to how you are going to do your final prove.  This amount gave me two 815g loaves.

I shaped each into a ball by gently flattening the ball and then folding the edges to the middle. 

I’m using large oblong shaped bannetons here so I then elongated the loaf to adjust to the shape of the basket.

N.B. If you don't have bannetons then simply shape your loaves and leave to rise on your baking tray at this stage.


I then turned the dough into the floured and seeded banneton upside down as I will later turn it onto the baking tray back on to the under side. 

Leave to prove for a second time until risen again.  This will be a shorter time than the first. 

Pre heat your oven to 220 ° C conventional and place your baking tray in the oven.  If you are using a steam bath technique put you empty tray under to heat up as well.

The dough is ready when you press a finger gently to dent the dough and the dent remains.

Remove the baking tray from the oven and sprinkle with a little flour.

Now turn the dough onto your pre heated and floured tray, spray with water, sprinkle with more flour and then very lightly carve three lines in the top with a very sharp knife.  

Return to the oven with a big spray of water into the oven or pour cold water onto your heated tray in the bottom of the oven. 

Bake for 10 minutes on 220 ° C then turn your oven down to 200° C for a further 40 minutes.  A total of 50 minutes.

Don't forget that ovens vary so take them out when they are done not simply at the end of the cooking time.  Bake the loaf not recipe!

Remember…

  • loaves coloured on the crust
  • feeling ‘light for the size’
  • sounding hollow when tapped. 

Enjoy


Saturday 18 October 2014

Sour Dough Update

Sour Dough in the garden.
Well, it’s been almost three months since I created my starter and I’m pleased to say that it is still alive and well and producing decent loaves of beautiful sour dough bread, flavoursome with a gorgeous texture.


3 months old this week!
I am able to leave it in the fridge for weeks at a time and reactivate it with a good feed to get it going again.  When left alone for a while it does develop quite a strong ‘alcohol’ smell which is a by – product of the feeding but that disappears when you work up the sponge.


It also separates when left alone as you can see here but returns to normal when mixed. 


I'm keeping it in a 2 litre Kilner style jar with a clip lid which gives me enough room to give it a good feed when needed.

I must say a huge thank you to Ballymaloe Cookery School as they have been most interested in my progress and still giving me advice by email.  Now that goes to show Ballymaloe is a school that actually really cares about their students’ progress even after the course has finished.


A few things of note...

Firstly, follow the procedure carefully!  On one occasion I didn’t do the float test and ended up with a very flat loaf indeed as the starter wasn’t at the active stage.  The activity of the yeast is of paramount importance to get a well risen loaf.

Secondly, it’s tough doing it by hand.  Whilst I got good and tasty results, it is extremely hard going kneading by hand due to the high level of hydration in the dough.  I have bought a Kenwood mixer for the first time to make life easier and I must admit I love it.  Although I still believe that we should all learn how to make bread by hand first so you know the stages from flour to loaf intimately.

Thirdly, it really does need that level of hydration.  As I was experimenting  I tried reducing the amount of water to make it easier to knead.  It was not as good by a long chalk.  Get the water in there no matter how sloppy it is.

And finally, sour dough toast with seasoned fried field mushrooms is a thing of beauty.  Tasty enough for you to give up the search for a meaningful relationship. 


If you want the full details on Sour Dough then check out my post...

http://theredbookcook.blogspot.com/2014/07/sough-dough-rules.html


Bon Appetit